More Than Mount Whitney
Inyo County offers moderate majesty for adventurous hikers Words and photos by Matt Johanson What...
Read More


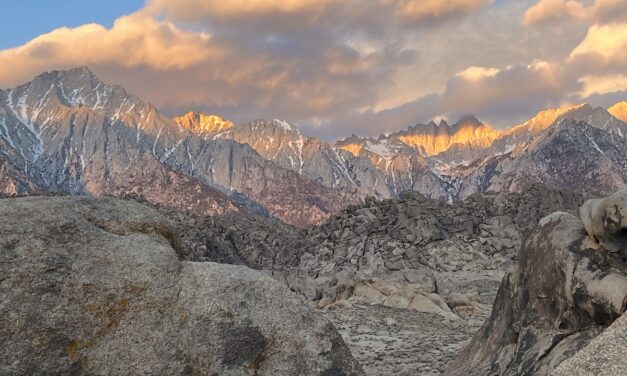
Inyo County offers moderate majesty for adventurous hikers Words and photos by Matt Johanson What...
Read More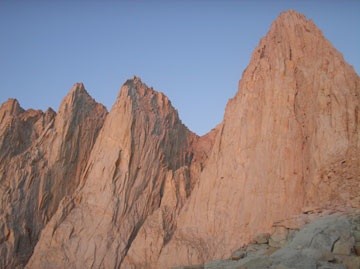
Climbing the most direct, aesthetic route up our highest peak Story and photos by Brennan Lagasse...
Read More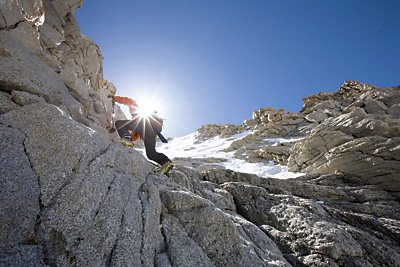
Skier Chris Davenport climbs and skis the Mountaineer’s Route on Mt. Whitney, spring 2008. Do you ever wish your camera had an auto setting labeled ‘Amazing Action Shot’? You’re not alone. Despite how easy it is to flip your camera to the ‘sports’ setting and hit the shutter button as your buddy blows past you skiing, biking, or paddling, it’s surprisingly hard to come away from the moment with a stellar image of the action. Whether the shot is well–framed but blurry or focused but missing half a head, there are a lot of ways a one-chance shot can be flubbed.
Read More


The driest place in North America was hammered by catastrophic flooding last year, and the hottest place in the world got hotter. 💦 🌅
In our current issue, Leonie Sherman reports on how @deathvalleynps staff dealt with the devastating impacts of Hurricane Hilary and another heat record-breaking summer, while also preparing for the next disaster. 🌬🌡
Read the article in our Winter 2023/2024 issue or at the 🔗 in our bio ⬆️
#deathvalleynationalpark #deathvalley #climatechange #adventuresportsjournal
In our current issue, Matt “Detour” Johanson takes us along the SoCal stretch of the Pacific Crest Trail. This fourth installment of Matt’s five-part series details his experience this past spring pushing through challenging conditions in the aftermath of a record-breaking winter.
Hop on trail with our intrepid adventurer at the link in our bio!
#adventuresportsjournal #pacificcresttrail #pct2023 #pctsectionhike #backpacking #earnyourbeer
Story and photos by Matt Johanson
— 🗻 A pack of hikers approach the snowy summit of San Jacinto Peak.
— 🌵 Cacti frame a view of the Colorado Desert.
— 🆙 San Gorgonio Mountain marks the highest point in Southern California.
— 📈 San Jacinto Peak is the steepest mountain in the lower 48 states.
— ⛄️ Hikers cross a snowfield in the San Gabriel Mountains.
Roadtrip idea 🏜️❄️ Have you ever seen Zion in the snow?! 🌵
From sandy deserts to snowy landscapes, this roadtrip idea will take you on an unforgettable journey through the contrasting beauty of Zion National Park. Make sure to check out Angels Landing, with snow covered peaks and contrasting desert canyons. But don't forget ice spikes! This is an adventure that will leave you in awe! ❄️🌵#WinterWonders #ZionNationalPark #RoadtripGoals
🌄 🌵Join us with our latest feature with the incredible artist @zielizg
Lizzie is a landscape artist based out of Salt Lake City, using her art as a form of activism and environmental protection, depicting scenes from the western states 🌍️
Learn more about Lizzie at the link in our bio! 🔗
Interview by contributing writer @ellasuring
Our recent article with Michael Allen is up! Featuring his new film A Long Road To Tao, that's being featured in the Las Cruces International Film Festival this spring along with his work as a fine art surf and wave photographer 🌊🎥
Check out Michael's work at the link in our bio 🔗
Written by contributing writer @ellasuring
🌲🚐 Adventure awaits! 🌟 Hannah from @ilikebigbuttress shares her journey moving across the country, starting a new career, and living out of a van full time. 🌄
This interview is part of a series of women in the outdoors. Learn more at the link in our bio 🔗
Story by our contributing writer @ellasuring
When it’s not raining, Castle Rock State Park offers amazing hiking and rock climbing just under an hour away from Santa Cruz! 🌲🥾
And when it is raining, you can still get out there and have some adventures! 🌧️
We went out last weekend in a break from the rain and sent some climbs at Indian Rock 🧗🏽
Just remember to bring water, snacks, warm clothes, and plan beforehand as there is no cell service there, adventure on!
#rockclimbing #adventuresports #outdoor
Winter is in full swing. She is challenging us to leave our cozy houses and our cozy cars once again. Will you answer the call? ❄️
Let’s get committed and embrace winter once again. Inside is cozy but outside is fun! 🏂
Click the link in our bio to see what is new at your favorite resort this year. 🔗 💕
Compiled by @skicalifornia 🙏🏽
Photos 📸
@diamondpeak
@bearvalleyresort
@skichinapeak
@dodgeridge
@junemountain
@mammothmountain
@bvadventure
@granlibakken
@tahoedonnerassociation
Tamarack Mammoth
Can anyone guess where this iconic Redwood Tree ring is in Santa Cruz? 🌲The canopies of redwood trees support entire ecosystems of wildlife, insects, plants, and they even create soil up there from decomposing leaves 🍂. Next time you go mountain biking, running, or hiking, take a glance up and wonder at the marvels towering above you! #hiking #santacruz #adventuresportsjournal
Last season was one for the record books — when Mammoth Mountain received over 700 inches of snow and stayed open for more than 270 days of skiing and riding. ⛷🏂
While skiers and riders played in the snow well into summer, the Mammoth construction teams were hard at work replacing chairlifts, building new activities, and improving Mammoth’s already robust snowmaking system. 💪🏽 ❄️
Click the link in our bio to see the fun that is on tap this winter in Mammoth. 🔗 😎
"My husband is a dirt hound. He loves the call of an empty, desolate dirt road. Growing up in Arizona, dirt excursions were a fundamental part of his upbringing, which is how my journey into the adventurous world of overlanding began." 🏜️
If you have a passion for isolation, unspoiled nature, and tackling challenging remote roads, overland camping might be just what you’re looking for. 🌄
Click the link in our bio to read Krista Houghton's latest article and discover what to expect and some vital tips to ensure your overlanding adventure is both enjoyable and safe. 🔗 💕
#offroadadventure #overlanding #overlandcamping #adventure #outside #fourwheelcampers #expion360 #rhinogear #toyota #outback
Mark your calendar for the second of this season's @alpenglowsports Winter Speaker Series on Thursday, January 4th. 📆
Brothers @jimwmorrison and @johnmorrison.sierraskijournal will present "Skiing the High Sierra and Beyond" at @palisadestahoe's Olympic Village Events Center. All giveaway, bar, and a portion of food proceeds will benefit the @senditfoundation. ⛷️
Doors open at 6pm and the show starts at 7pm. The event is free and all ages are welcome! Live streaming is also available on YouTube. There will be giveaways for both in-person attendees and those tuning in from afar. 👏🏽
See the link in our bio for more info! 🔗 💕
📸 Photos by @christianpondella
